
Voeg in enkele minuten lidmaatschappen toe aan uw Webflow-project.
Meer dan 200 gratis kloonbare Webflow componenten. Aanmelden is niet nodig.
Voeg in enkele minuten lidmaatschappen toe aan uw React-project.
How to Easily Add Customizable Tooltips to your Webflow Site
Ledenafschriften nodig
https://www.memberstack.com/scripts/tooltips-for-webflow
Les
Kloonbaar

Why/Use Cases –
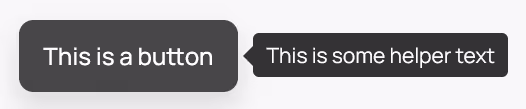
- Add customizable tooltips to your site to help visitors better understand certain elements and what interacting with them will do.
Our guide below will help you add tooltips to your Webflow site using Tippy.js, which is a popular JavaScript library for tooltips. It has been converted into an attribute-based solution for Webflow with multiple possible attributes to make your tooltips work the way you want.
Adding customizable tooltips to a Webflow site
To add customizable tooltips to your Webflow site, we’re going to use MemberScript #110 – Tooltips for Webflow. Follow the link to get the code you’ll need to add to your page and watch a video tutorial on how to set everything up.
Setting it up
Start by selecting whatever it is that you want to add a tooltip to – a button, an image, etc.
Based on where you want to place the tooltip relative to the element the user is hovering over, you’ll need to add one of the following attributes:
· ms-code-tooltip-right=”YOUR TEXT GOES HERE”
· ms-code-tooltip-left=”YOUR TEXT GOES HERE”
· ms-code-tooltip-up=”YOUR TEXT GOES HERE”
· ms-code-tooltip-down=”YOUR TEXT GOES HERE”
Alternatively, you can add the following two attributes:
· ms-code-tooltip-placement=”PLACEMENT”
· ms-code-tooltip-content=”YOUR TEXT GOES HERE”
Instead of the “PLACEMENT” value, you can add any one of these: "top", "top-start", "top-end", "right", "right-start", "right-end", "bottom", "bottom-start", "bottom-end", "left", "left-start", "left-end", "auto", "auto-start", and "auto-end".
Next up is the entrance animation of the tooltip, which you can choose using the following attribute:
· ms-code-tooltip-animation=”VALUE”
The value here can be any one of these: “fade”, “shift-away”, “shift-toward”, and “perspective”.
Then we have the tooltip’s theme, which can be either dark or light and you can choose with the following attributes:
· ms-code-tooltip-theme=”dark”
· ms-code-tooltip-theme=”light”
Now there’s the maximum width that you might want to set in case you have a longer tooltip and you can do so with this attribute:
· ms-code-tooltip-maxwidth=”NUMBER OF PIXELS”
There’s a lot more attributes that you can set to customize your tooltips and to see the full list along with live demos of each attribute, visit the cloneable page and just scroll down.
Het laten werken
Now that you’ve got everything configured and your tooltips are set up in Webflow, all you need to do is add the MemberScript #110 custom code to your page (or sitewide if that makes more sense), before the closing body tag.
Conclusie
That’s everything, you can now go ahead and test your tooltips on the live site.
Als u ons demoproject wilt gebruiken om u op weg te helpen, klikt u op de knop hieronder om het aan uw Webflow site toe te voegen.
Our demo can help you add customizable tooltips to your Webflow site using the popular Tippy.js library.
Button – Get cloneable

.webp)


.png)

